
Creating a custom energy monitor using the ZENTAR split core current transformers
DIY projects are a fantastic way to engage with technology while also enhancing your home’s efficiency. One such project that will help you better understand your home’s electricity usage is creating a custom energy monitor using the ZENTAR CT (split core current transformer). This article will guide you through the entire process, from buying the necessary components to designing, installing, and enjoying your energy monitor.
What You Need to Buy
Before you start, let’s go over the essential components you’ll need:
Split Core Current Transformer (CT313 @ 100A) from ZENTAR
The ZENTAR CT313 is ideal for monitoring up to 100A of current. The split core design makes it easier to install without needing to disconnect any wires, a huge advantage for DIY projects.
Microcontroller
A microcontroller, such as Arduino or Raspberry Pi, will be used to read and process the data from the current transformer.
Display
A small LCD or OLED display will be useful to visualize the energy data from your monitor in real-time.
Resistors and Capacitors
These components are necessary for smoothing the data signals and protecting the circuit.
Protoboard (Breadboard)
This will be used for setting up and testing your connections before finalizing your circuit.
Headphone Jacks
Optional, for better portability and for connecting the data cables to the microcontroller.
These are the basic components that will allow you to start building your home energy monitor.
Design a Case Using a 3D Printer
Once you’ve gathered your components, you’ll need a case to house the circuit and transformer. The 3D printer is an excellent tool for this. You can design the case to fit your parts perfectly, and printing it yourself ensures you have a custom, snug fit.
Consider designing the case to be both functional and aesthetically pleasing. You might want to create cable management holes, mounting slots, and an opening for the display.
Design a System to Ingest Data from Energy Monitors
Now, you’ll need to create a system that collects data from the ZENTAR CT. Here’s how it works:
The current transformer (CT) detects the current flowing through the electrical wires.
The sensor’s data (which is usually in the form of an AC signal) is sent to the microcontroller.
The microcontroller will process the data and convert it into readable metrics such as watts, kilowatts, and consumption rates.
Archiving the Data
It’s important to archive the data for future reference and analysis. This can be done by storing the data locally on an SD card or sending it to a cloud-based server. For this project, you can use the Arduino SD card shield to store the energy usage data.
Alternatively, if you want to take it a step further, you can integrate with an online database like Firebase or ThingSpeak to store and visualize the data remotely.
Calculating the Consumption in Total
Once your system is in place, the next step is to calculate the total consumption. You can write a simple algorithm in the Arduino code that calculates the total energy usage over a period.
Here’s an example:
This algorithm will give you a real-time view of how much energy is being consumed by your home or appliances.
Arduino Software
The heart of your energy monitor is the Arduino software (or firmware) that processes all the data. You’ll write code to read the data from the CT, calculate the consumption, display it, and even archive it.
Here’s a simplified outline of the steps involved in the software development:
Initialize the necessary libraries (e.g., for the CT sensor, display, SD card).
Read data from the ZENTAR CT.
Process the raw data into readable formats (e.g., watts or kilowatt-hours).
Display data on the screen.
Store data for later use (optional).
Install the Current Transformer (CT)
The installation of the split core current transformer is one of the most crucial steps. Since this is a split core CT, installation is a breeze.
Clip the CT around the wire you want to measure (typically the live wire).
Connect the CT to the microcontroller according to the wiring diagram you created.
Ensure that the CT is properly seated to get accurate readings.
Expose the Data
Once your system is reading the data, you will want to expose the data to make it useful.
Display the data on the screen (LCD/OLED).
Expose the data to a cloud-based system for long-term monitoring.
Create a web interface or mobile app to access the data from anywhere.
Develop the App
To take your project a step further, you can develop an app to interact with your energy monitor. The app can display the data, send notifications for high consumption, and allow you to track energy usage trends over time.
You can develop the app using technologies like Flutter, React Native, or Native Android/iOS. For more advanced users, integrating with platforms like IFTTT can add additional automation capabilities, like turning off devices when energy consumption is too high.
Read the Data and Enjoy!
At this point, you have your energy monitor up and running. You can now read the data from your display or app, track energy consumption, and make smarter decisions about energy use. Whether it’s turning off devices when they’re not needed or identifying high-consumption appliances, this monitor will give you real-time insights into your home’s energy use.
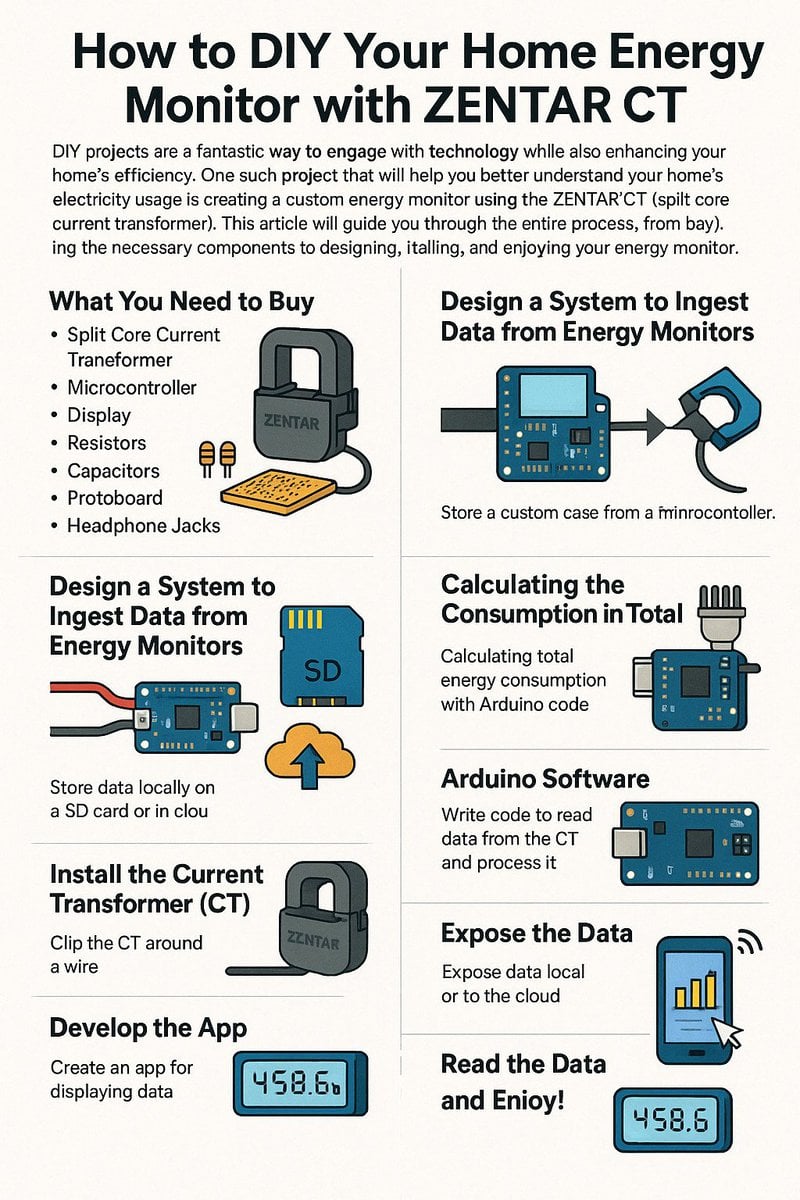
This is a figure illustrating the assembly steps
FAQs
1. What is the ZENTAR CT and how does it work?
The ZENTAR CT is a split core current transformer used to measure electrical current flowing through wires. It works by detecting the magnetic field produced by the current and converting it into a readable signal.
2. Can I use this energy monitor for all appliances in my home?
Yes, the energy monitor can be used for any appliance, as long as you install the CT around the correct wire. For larger appliances, you may need a higher-rated CT.
3. Do I need any previous experience in electronics for this project?
Basic knowledge of electronics and coding (especially Arduino) will be helpful. However, the project is beginner-friendly and includes all the necessary steps for you to follow.
4. Can I monitor multiple circuits at once?
Yes, you can monitor multiple circuits by using multiple current transformers and microcontroller inputs. You’ll need to modify your code to handle multiple readings.
5. How can I store and analyze my energy data?
You can store your data on an SD card or upload it to a cloud service like ThingSpeak or Firebase. You can then analyze the data using graphs or reports.